![]()
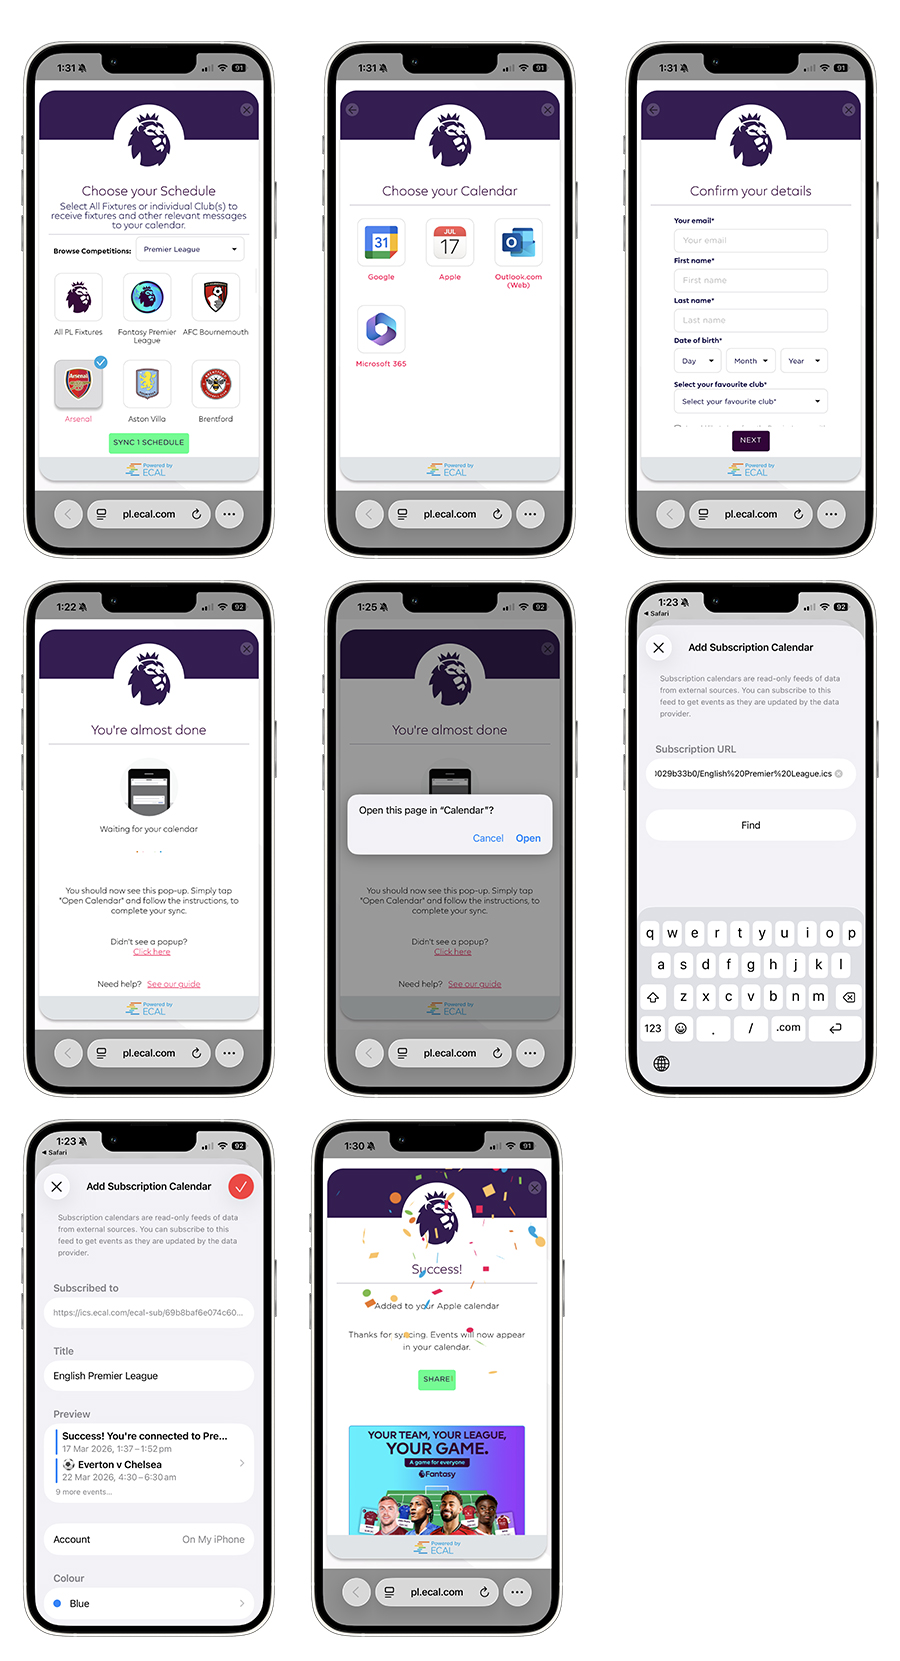
- Step 1. Click the ECAL ‘Sync to Calendar’ button
- Step 2. Choose the schedules that you want to subscribe to and hit ‘Sync Schedule(s) (if applicable)
- Step 3. Choose the ‘Apple’
 option from the list of calendars
- Step 4. Fill out the Confirm your Details form and click ‘Next’
- Step 5. This will launch a popup and you’ll be prompted to Open this page in “Calendar” – click Open.
- Step 6. Your apple Calendar will open, asking you to Add Subscription Calendar. You will see the subscription URL and a ‘Find’ button. Please click the find button.
- Step 7: A summary of the calendar is provided where you can update colours etc. Click the red tick!
- Step 8: To confirm successful sync, navigate back to your browser and you will see the Success screen (with confetti) confirming successful sync.